


Mac OS X
Overview
Installation
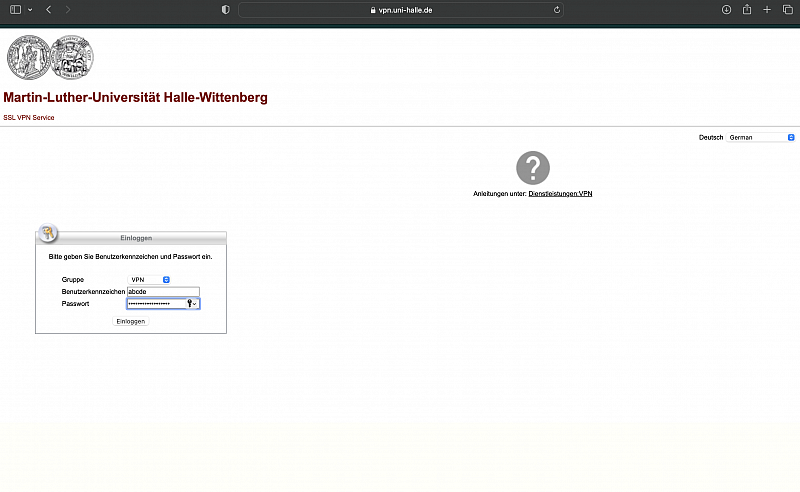
In your internet browser, open the page "https://vpn.uni-halle.de." Login with your five-character username and the corresponding password you received from the Serviceportal.
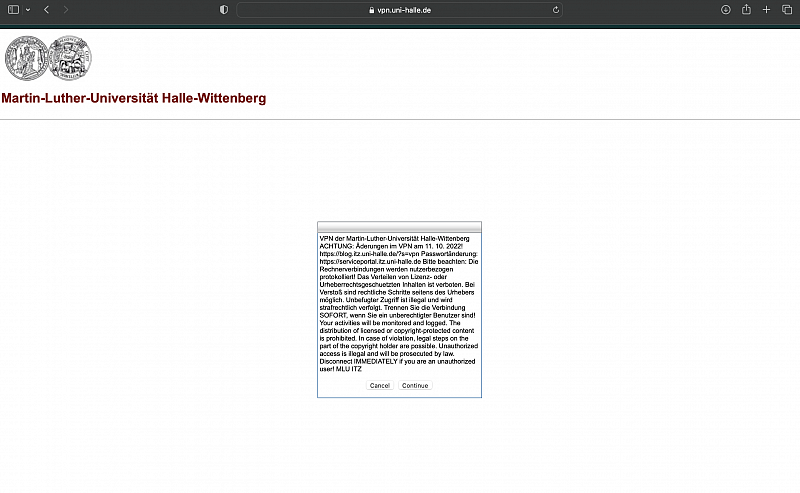
Carefully read the terms of service. Accepting these terms is a requirement for using the university's VPN service.
If you accept the terms, click "Continue."
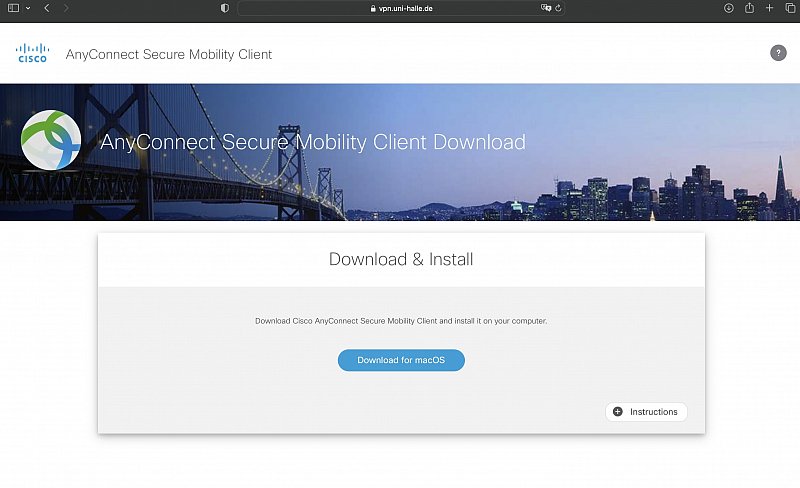
In the next window, click on "Download for macOS" to start downloading the AnyConnect client.
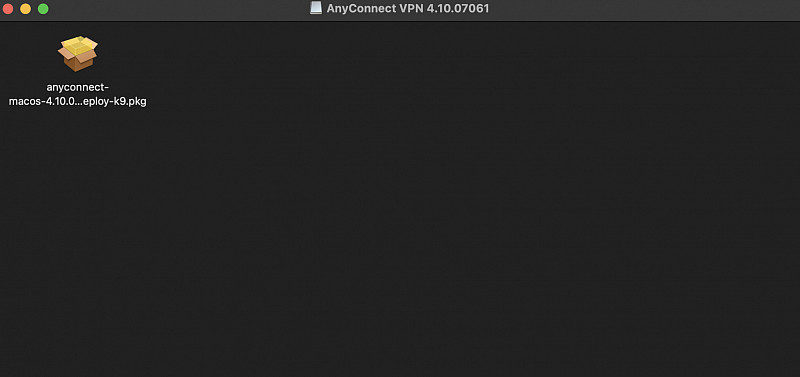
When the download is done, double click the downloaded ".dmg" file. In the window that opens, double click the ".pkg" file to start the installer. Follow the instructions it presents.
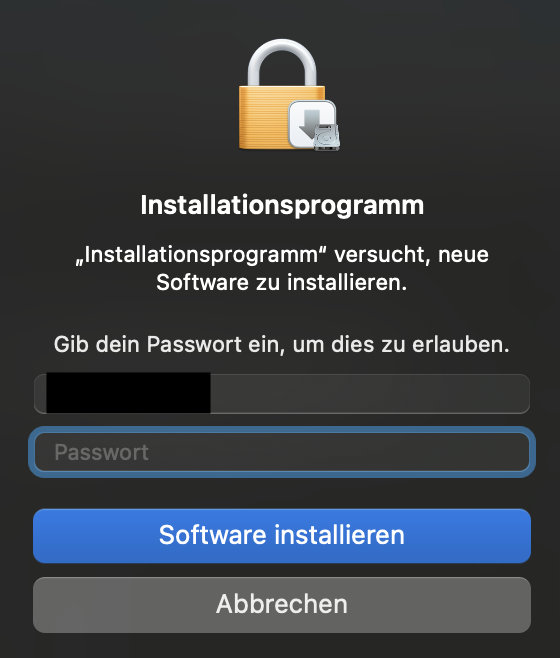
The installation requires administrator rights. You must authenticate with your computer's username and password in order to continue.
Mac credentials, not MLU credentials
Please note that this is not your five-character username and password you received from the Serviceportal, but the account you use for logging into your Mac.
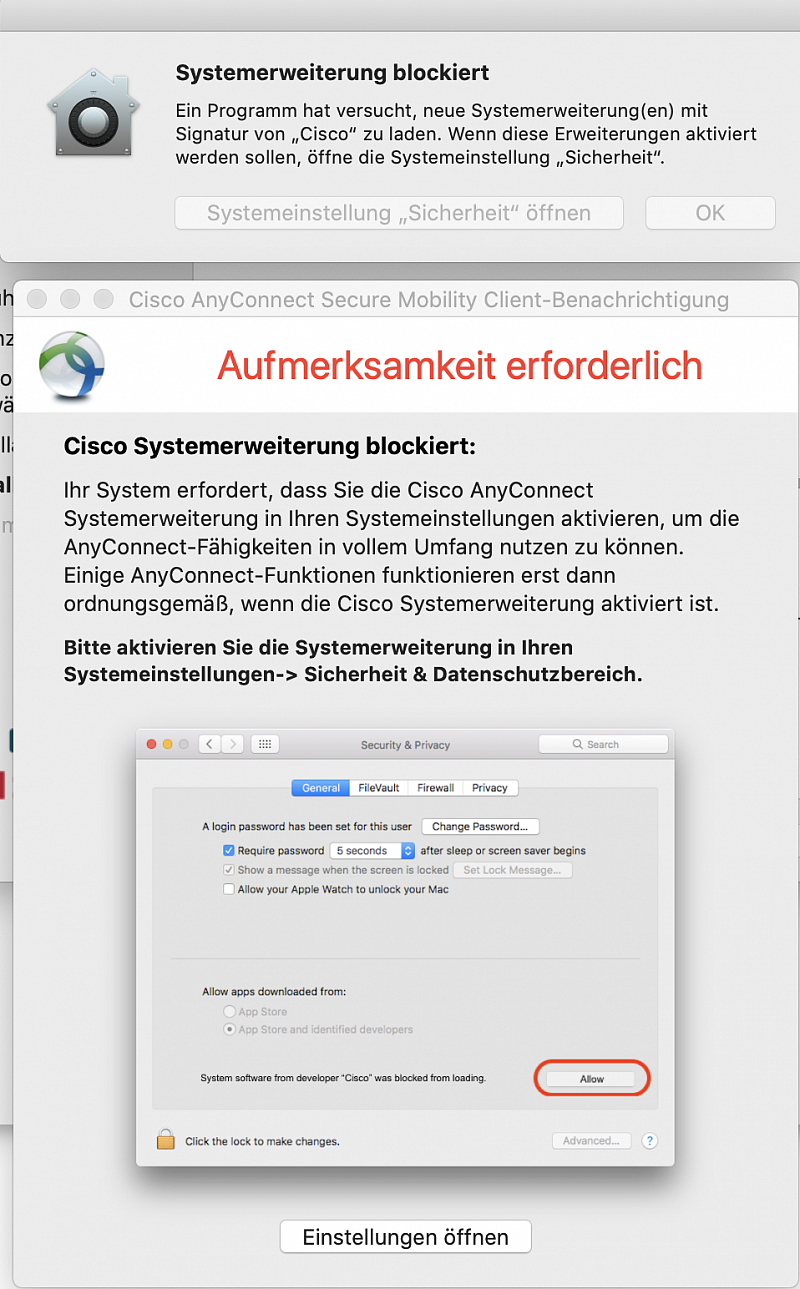
The VPN client requires a system extension. Click on "Open Settings" in the appearing window to set it up.
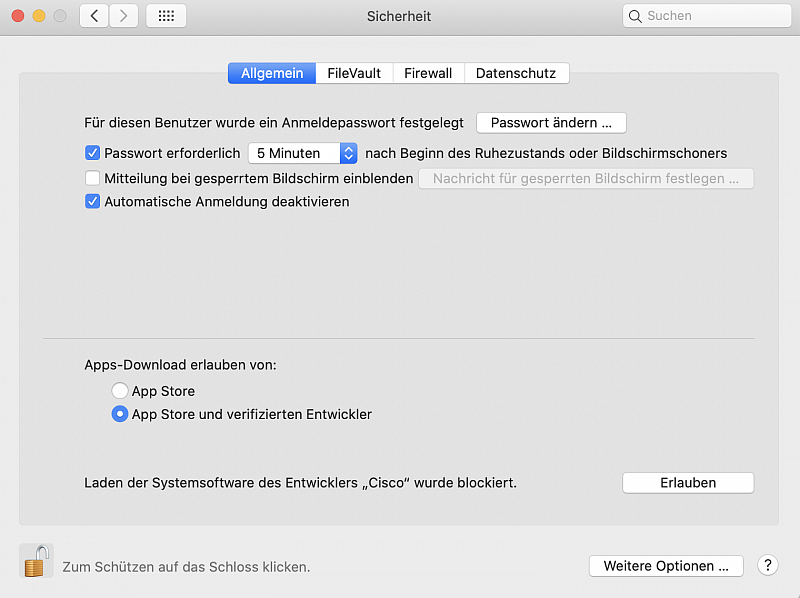
This will open the Mac OS X Security Settings window. Click on the "General" header at the top, then on the lock at the bottom to enable editing the settings.
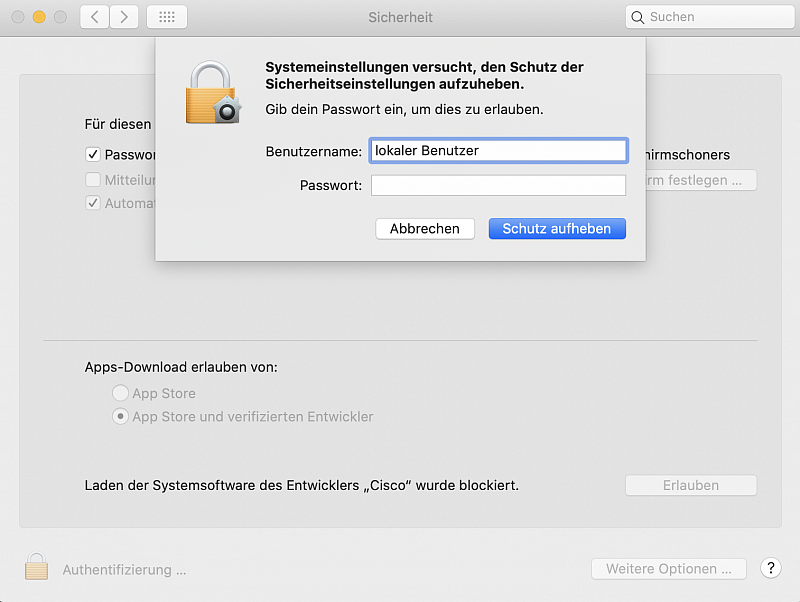
Editing the security settings will require you to authenticate again.
Mac credentials, not MLU credentials
Again, use your Mac's username and password, not the five-character username and password you got from the Serviceportal.
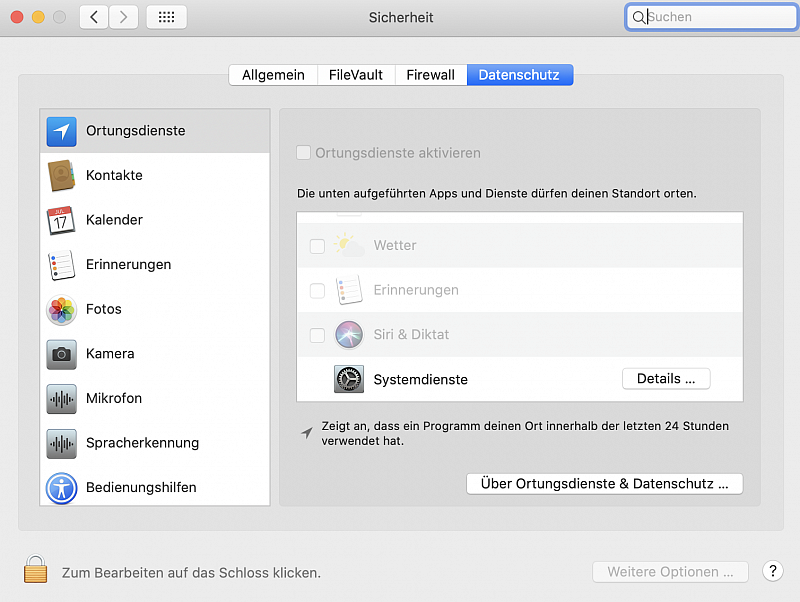
VPN Mac: Security Settings with edits enabled
On the bottom right, click "Allow" to enable loading the Cisco system extension.
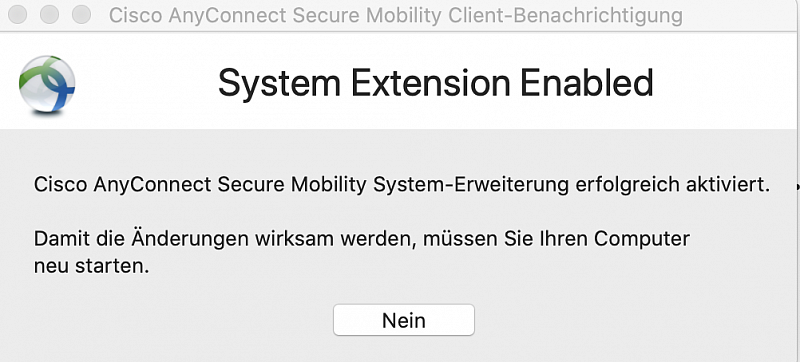
VPN Mac: Sytem extension enabled
The system extension is now enabled. Restart your computer for these settings to take effect.
Connecting to the VPN

VPN Mac: VPN client in Finder
The VPN client is installed and ready for use. You can find it in the list of installed programs in the "Cisco" folder. Double click on it to start it.
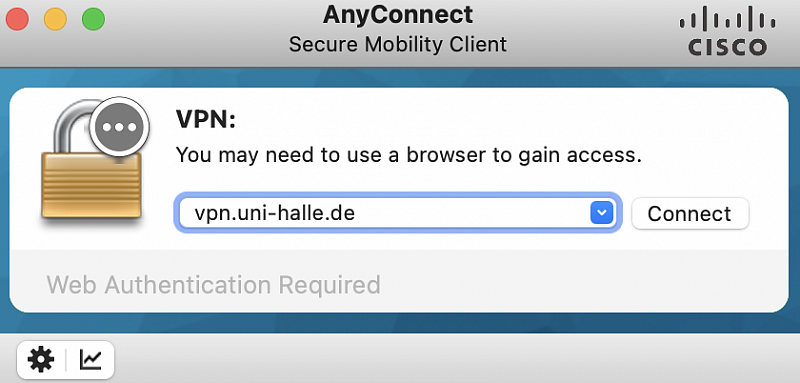
VPN Mac: Enter VPN server address
In the VPN client window, enter "vpn.uni-halle.de" as the server address and click "Connect" to start establishing the connection.
Do not add "https://" at the start of the server name.
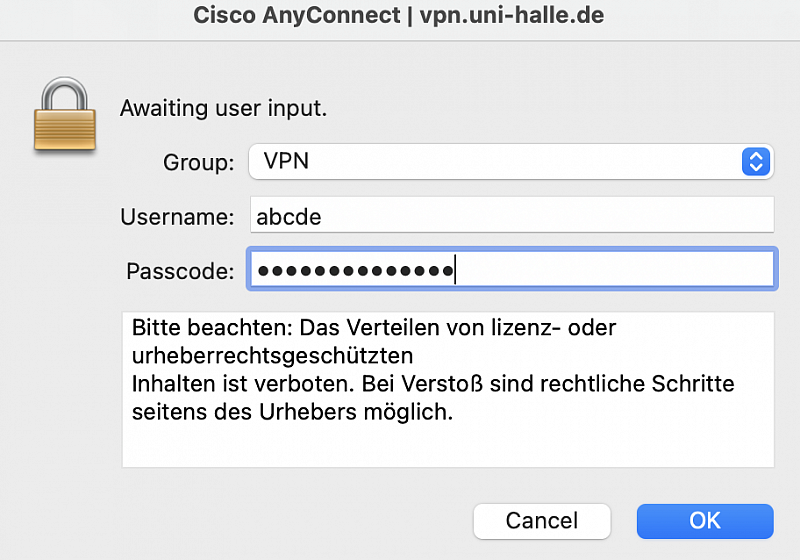
VPN Mac: Enter MLU credentials
Next, enter your five-character username and the corresponding password you received from the Serviceportal. The VPN client will save them for you so you will not have to enter them again.
Click "OK" to continue establishing the connection.

After a few moments, the Cisco AnyConnect icon should appear in your system tray, covered by a lock symbol. This means the connection to the MLU VPN has been established successfully. The VPN server's name, your username and password will be remembered by the client for the next time you connect to the VPN, so you won't have to enter them again.