Linux
Diese Seite beschreibt Installation und Benutzung des offiziell unterstützten Cisco AnyConnect VPN-Clients.
Unterstützte Architekturen
Bitte beachten Sie, dass der Cisco AnyConnect-Client nicht alle Prozessorarchitekturen unterstützt. Unterstützt werden ohne Probleme die x86- und die x86_64-Architektur. Falls Ihr Rechner eine andere Architektur hat – wie zum Beispiel ein Raspberry Pi, das die ARMv6/7-Architektur benutzt –, schlägt die Erkennung wahrscheinlich fehl. In diesem Fall können Sie sich mit dem AnyConnect-kompatiblen OpenConnect behelfen, der von uns jedoch nicht unterstützt wird. Die Anleitung dazu finden Sie links im Navigationsmenü.
Installation
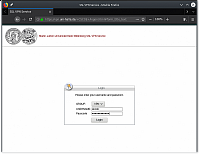
"https://vpn.uni-halle.de" im Browser
Öffnen Sie einen Webbrowser und besuchen Sie die Seite "https://vpn.uni-halle.de". Geben Sie bei "USERNAME" Ihr fünfstelliges Nutzerkennzeichen und bei "Passcode" Ihr Nutzerpasswort ein. Klicken Sie dann auf "Login".
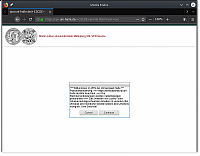
Nutzungsbedingungen im Browser
Lesen Sie sich die Nutzungsbedingungen durch. Wenn Sie die Bedingungen akzeptieren, klicken Sie auf "Continue".
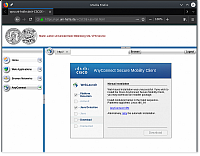
Manueller Download der AnyConnect-Client-Installationsdateien
Die Webseite wird nun versuchen, den Client automatisch zu installieren. Bitte beachten Sie, dass ein Fehlschlag an dieser Stelle beabsichtigt ist.
Nachdem die automatische Installation fehlgeschlagen ist, können Sie den Client manuell installieren. Klicken Sie dazu auf den Link "AnyConnect VPN".
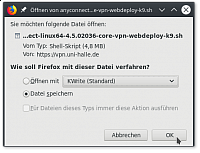
Speicherdialog des VPN-Setup-Skripts
Daraufhin erscheint das Dialogfeld zum Speichern des VPN-Client-Installationsskripts. Wählen Sie "Datei speichern".
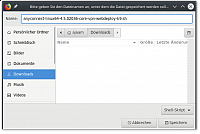
Speicherort auswählen
Speichern Sie die Datei auf Ihre Festplatte. Es wird empfohlen, die Datei in Ihrem "Downloads"-Ordner zu speichern, da dies die folgenden Schritte vereinfacht.
Browser fragt nicht nach Speicherort
Manche Browser speichern die Datei ohne weitere Nachfrage an einem festgelegten Ort, üblicherweise im Ordner "Downloads". Sollte das Fenster zum Wählen des Speicherorts nicht erscheinen, finden Sie die heruntergeladene Datei in diesem Ordner.
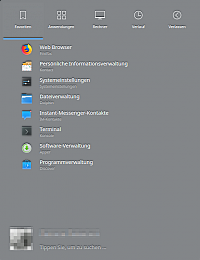
System-Hauptmenü
Die folgenden Schritte lassen sich leider nur auf der Befehlszeile (im Folgenden auch "Terminal" genannt) ausführen, aber keine Sorge: Sie müssen nur einen Befehl eingeben.
Um ein Terminal zu starten, öffnen Sie zunächst das Hauptmenü Ihres Systems.

"terminal"-Eingabe im Hauptmenü
Geben Sie die ersten Buchstaben des Wortes "Terminal" ein. Das entsprechende Programm sollte in der Liste auftauchen. Klicken Sie es an, um es zu starten.
Programmsuche im Hauptmenü
Diese Art der Suche wird von den Menüs vieler Linux-Distributionen unterstützt. Falls auf Ihrem System die Unterstützung dafür fehlt, finden Sie das Terminal üblicherweise unter "Zubehör", "Systemprogramme" oder "Dienstprogramme".
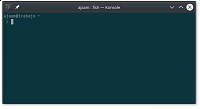
VPN Linux: Leeres Terminal
Sie sollten ein Terminal-Programm vorfinden, das dem links dargestellten ähnelt. (Die Farben, Schriften und der Text weichen mit aller Wahrscheinlichkeit ab.)
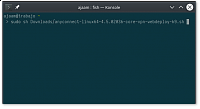
Setup-Skript starten
Damit ist das Skript bereit zur Installation. Um das Skript zu starten, geben Sie im Terminal folgenden Befehl ein, gefolgt von Enter:
sudo sh Downloads/
Ersetzen Sie hierbei "
Um sich beim Eintippen des langen und komplizierten Namens Arbeit zu ersparen, können Sie die ↹-Taste wie folgt benutzen:
Langer Dateiname? Drücken Sie ↹
Um die Eingabe langer Namen zu vereinfachen, unterstützen nahezu alle Terminals unter Linux die "Tab-Vervollständigung": Das Terminal schreibt einen Dateinamen automatisch zu Ende, wenn Sie die Tabulator-Taste (↹, unter der Esc-Taste) betätigen und der Name eindeutig ist.
Geben Sie daher beispielsweise ein:
sudo sh Downlo↹
…und das Terminal vervollständigt es zu:
sudo sh Downloads/
Dann tippen Sie weiter:
sudo sh Downloads/anyconnect↹
und das Terminal schreibt den Namen der Datei aus:
sudo sh Downloads/anyconnect-linux64-4.5.02036-core-vpn-webdeploy-k9.sh
su statt sudo
Auf manchen Systemen könnten Sie nach der Eingabe des Befehls folgende Ausgabe erhalten:
bash: sudo: Kommando nicht gefunden.
In diesem Fall müssen Sie den su-Befehl benutzen:
su -c 'sh Downloads/
Bitte beachten Sie die einfachen(!) Anführungszeichen um den Befehl.
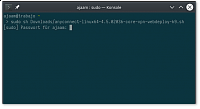
sudo-Passwortabfrage
Die Installation des Skriptes setzt Administratorrechte voraus. Geben Sie daher Ihr Computerpasswort ein – nicht das Passwort, das zu Ihrem fünfstelligen Nutzerkennzeichen gehört – und drücken Sie Enter.
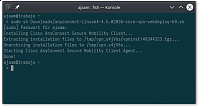
Installation erfolgreich
Das Skript wird nun installiert. Wenn das Wort "Done!" erscheint, haben Sie alles richtig gemacht: Das Programm ist nun installiert.
Sie können das Terminal nun schließen und das Installationsskript wieder aus Ihrem Downloads-Ordner löschen.
VPN-Verbindung herstellen
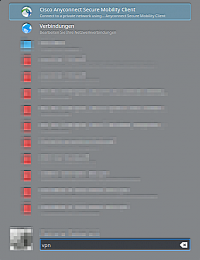
"vpn"-Eingabe im Hauptmenü
Öffnen Sie wieder Ihr Hauptmenü und suchen Sie nach "vpn", "anyconnect" oder "cisco". Nach den ersten paar Buchstaben sollte das Programm in der Liste auftauchen. Klicken Sie es an, um es zu starten.
Das VPN-Programm starten
Auch hier gilt wieder: Falls Ihr System diese Art der Suche nicht unterstützt und sich stattdessen ein Menü öffnet, finden Sie das VPN-Programm üblicherweise unter "Netzwerk", "Systemprogramme" oder "Dienstprogramme".
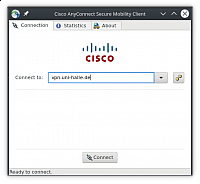
Verbinden mit vpn1.uni-halle.de
Geben Sie in das "Connect to"-Feld bitte eine Serveradresse "vpn.uni-halle.de" ein und klicken Sie dann auf "Connect", um die VPN-Verbindung herzustellen.
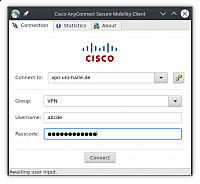
Eingabe der Nutzerdaten im VPN-Programm
Geben Sie Ihr fünfstelliges Nutzerkennzeichen und Ihr Nutzerpasswort ein. Klicken Sie dann wieder auf "Connect".
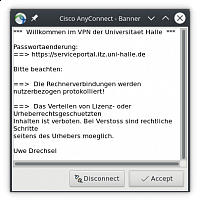
Nutzungsbedingungen im VPN-Programm
Wenn die Authentifizierung erfolgreich war, öffnet sich ein Fenster mit den Nutzungsbedingungen für den VPN-Zugang. Wenn Sie den Nutzungsbedingungen zustimmen, klicken Sie auf "Accept".

Wenn das AnyConnect-Symbol in Ihrer Menüleiste jetzt mit einem Schloss versehen ist, wurde die VPN-Verbindung erfolgreich hergestellt.
VPN-Verbindung trennen

VPN-Verbindung trennen
Um eine bestehende VPN-Verbindung zu trennen, klicken Sie mit der rechten Maustaste auf das VPN-Programmsymbol in der Menüleiste. Klicken Sie dann auf "Disconnect". Wenn das Schloss vom Symbol verschwindet, haben Sie Ihre VPN-Verbindung erfolgreich getrennt.


